
Make a Mini Sponge Christmas Tree Ornament
Are you bored of the same old Christmas balls on your Christmas tree? Or do you have to spend a lot just to reinvent your Christmas tree? Why not create your own ornament and let your imagination decide. Let us make this mini Christmas tree ornament out of sponge paper. This is a fun activity that you can do with your kids or with the kids at heart. Let’s start!
Step 1: (xmas tree photo 1) Prepare all the materials from the list below:

Red, green, yellow and white sponge paper

Copper wire

Long nose pliers

Scissors

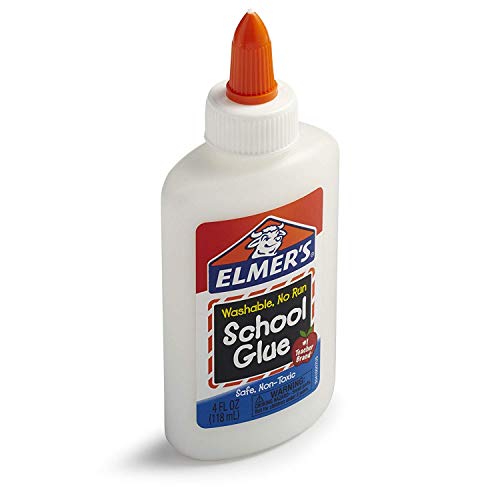
Concrete glue
Crochet thread

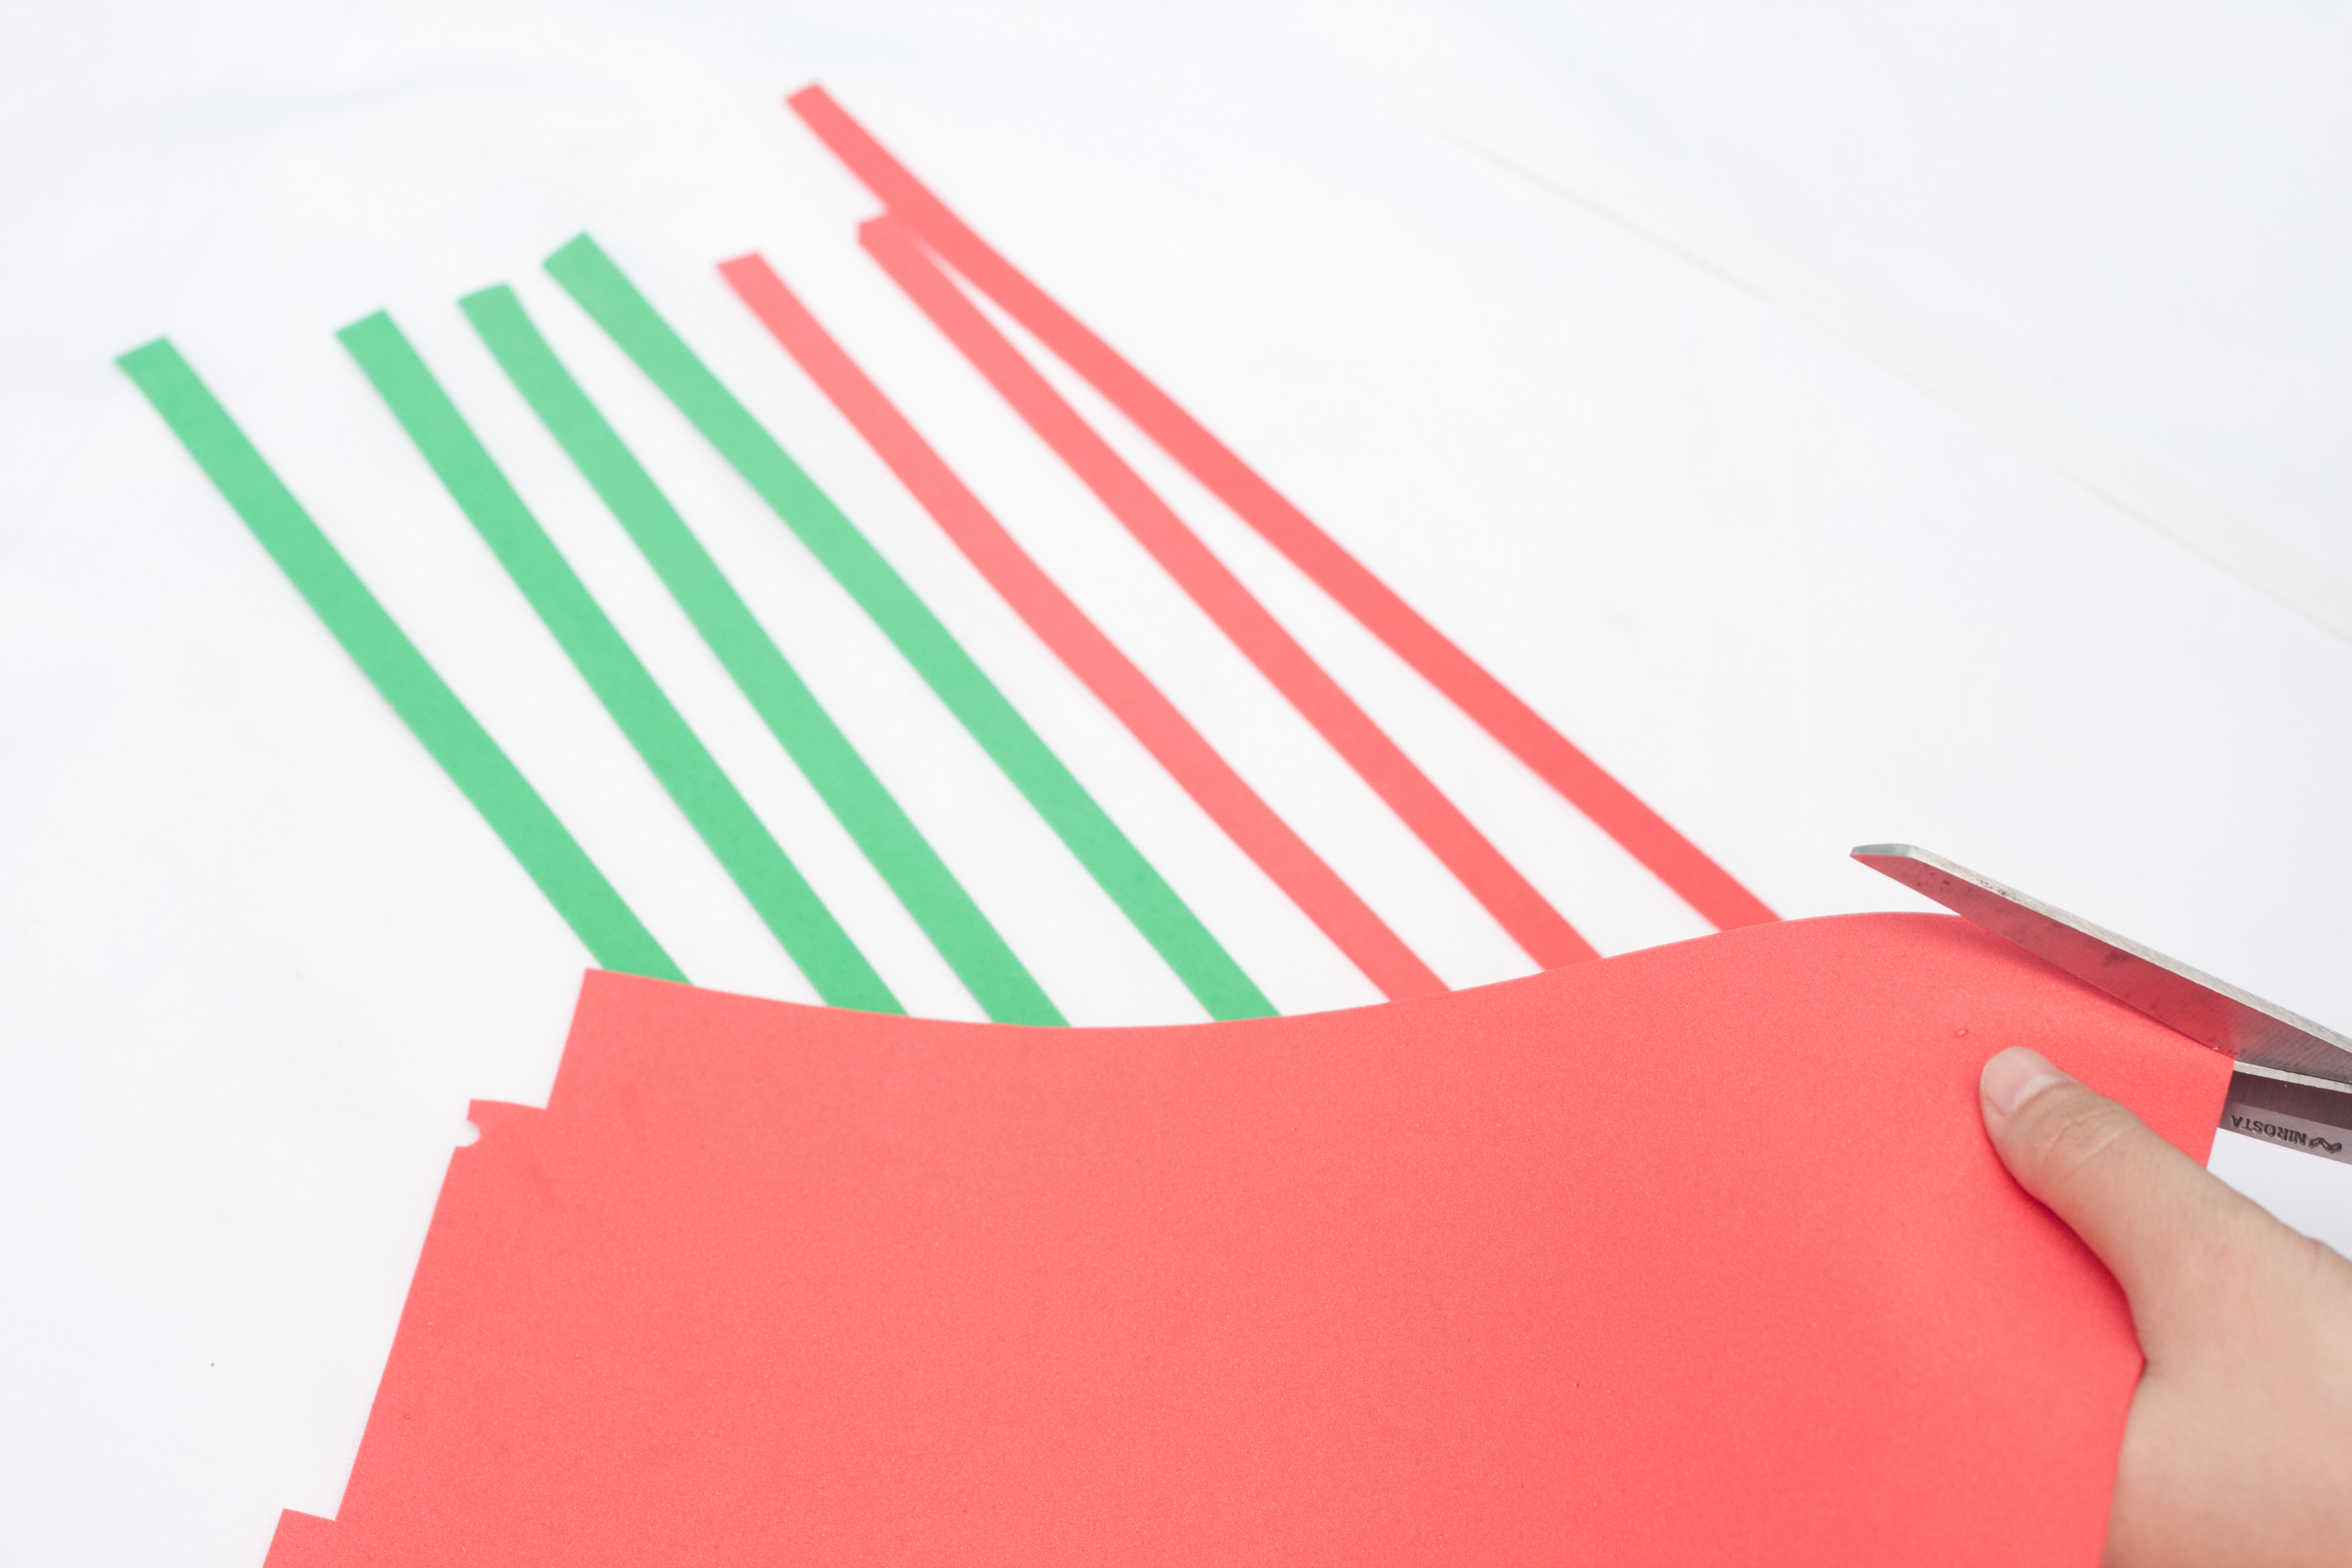
Step 2: (xmas tree photo 2) Cut several strips of white, green and red from the sponge paper. The thickness of the strips will depend on how you want the Christmas tree to look. Each strip will be used to make a layer of the Christmas tree so thicker strips will create taller layers.
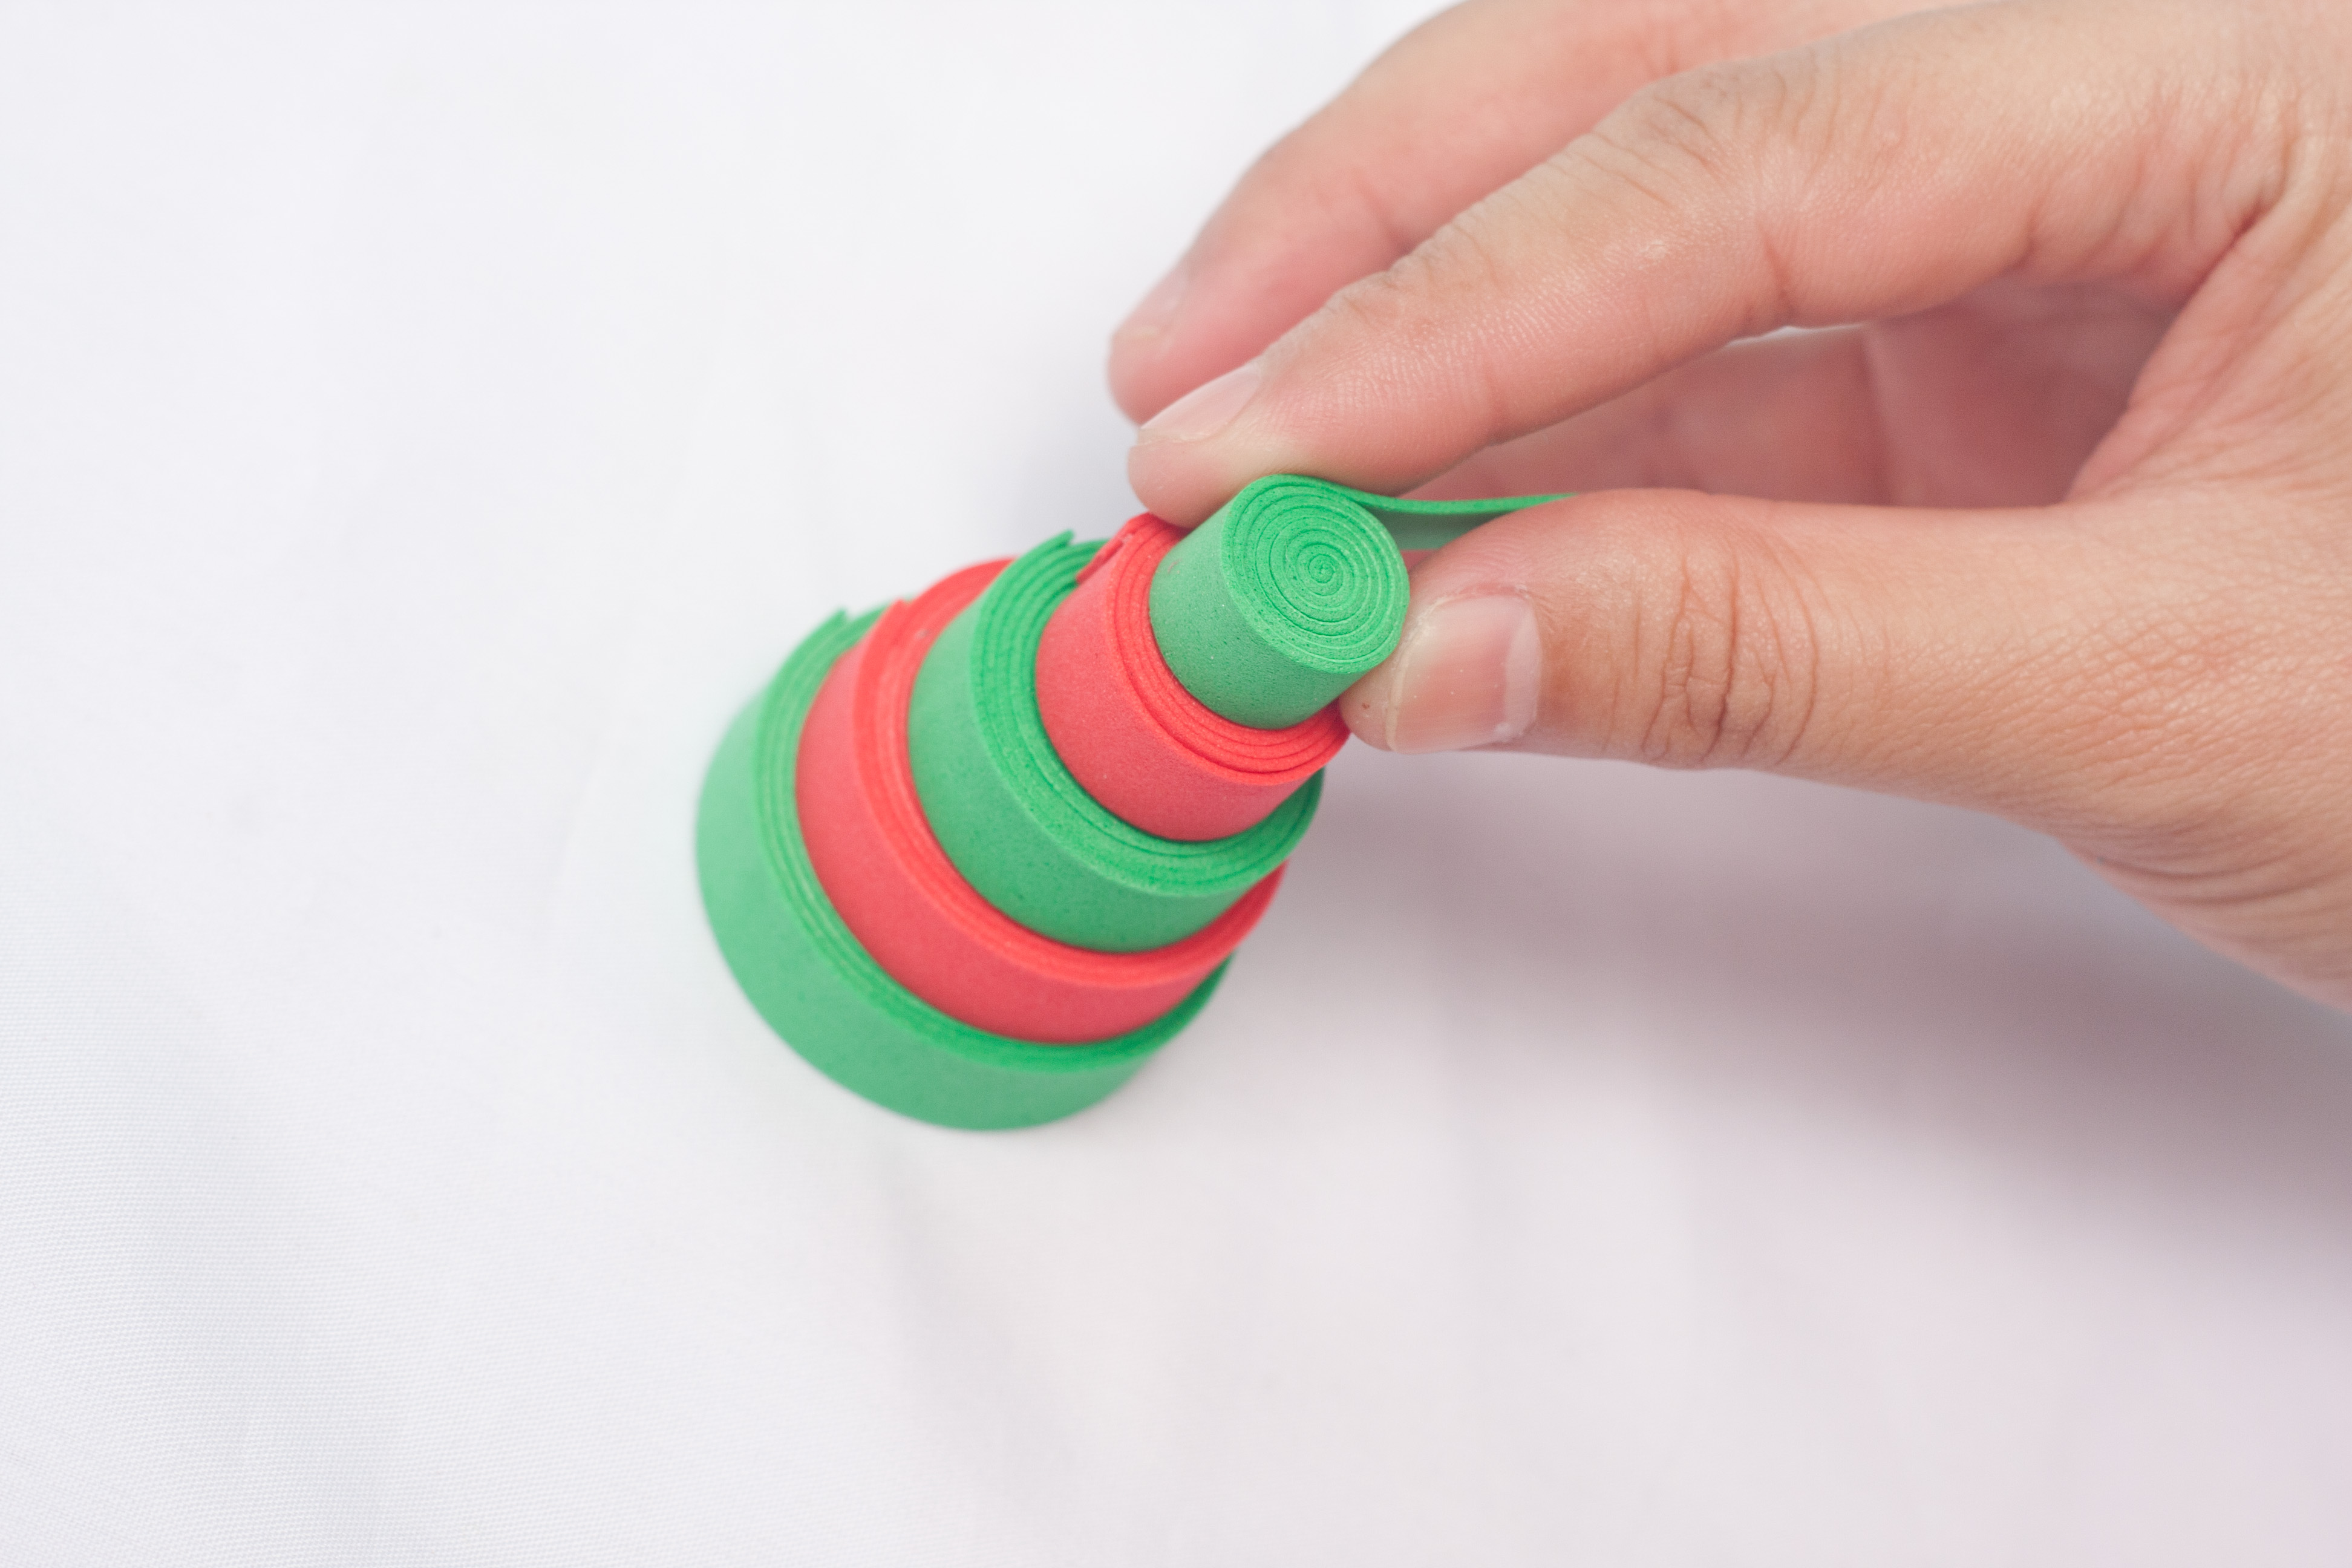
Step 3: (xmas tree photo 3) Tightly roll the white strip. This will be the base of the Christmas tree.

Step 4: (xmas tree photo 4) Tightly roll one of the green strips to create a thick base layer for your Christmas tree. Seal the end of this roll using concrete glue.

Step 5: (xmas tree photo 5) Next you’re going to create four more layers for your Christmas tree by tightly rolling alternating red and green strips, and sealing the ends of each roll with concrete glue. Each layer should be slightly thinner than the last and when stacked on top of the base, all the layers should form the shape of a Christmas tree.

Step 6: (xmas tree photo 6) Stack the sponge rolls to measure if the diameter of each roll is proportionate to each level.
Step 7: (xmas tree photo 7) On the top green sponge roll, push the middle out using your finger. You can also use a pointed object like a pen if you are having a hard time. This will hold the star later on.

Step 8: (xmas tree photo 8) Cut the tip of the pushed green roll to flatten it and make room for the star.

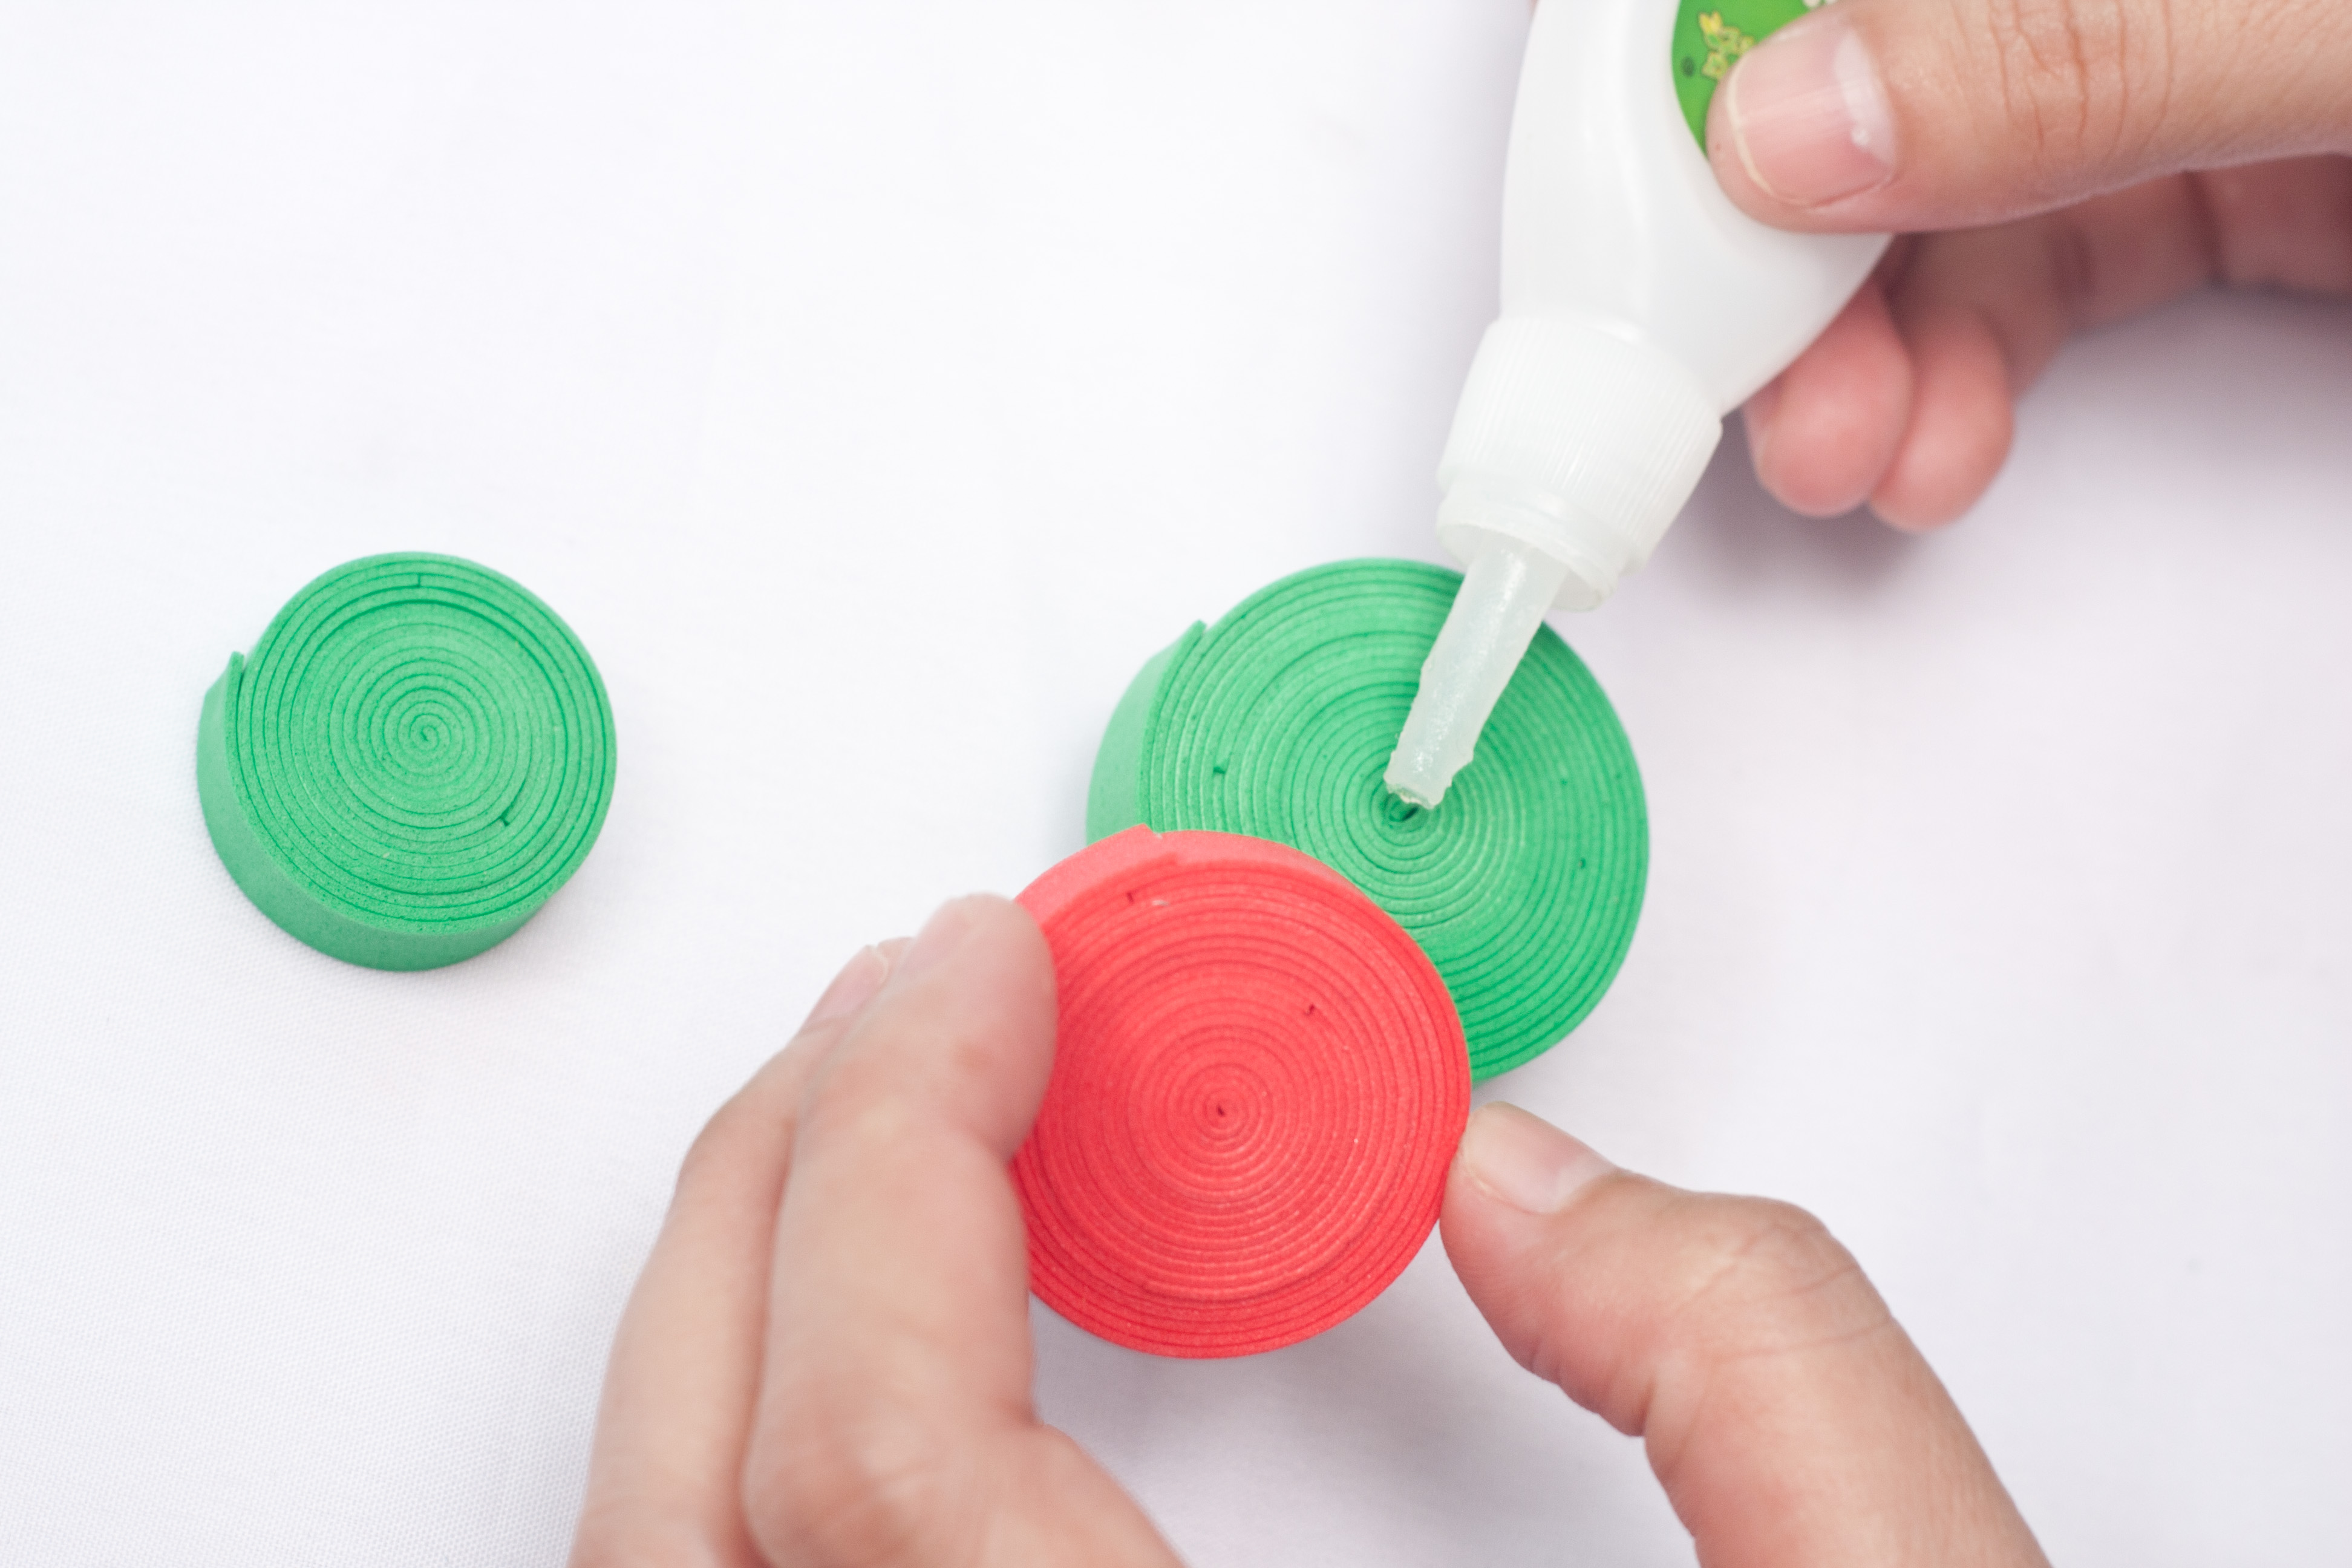
Step 9: (xmas tree photo 9) Using concrete glue, stick the white base to the thickest green roll.

Step 10: (xmas tree photo 10) Continue using the concrete glue to stick the additional layers together.
Step 11: (xmas tree photo 11) Fix the pointed green roll on the top of the tree and let it dry for a while.

Step 12: (xmas tree photo 12) Cut a small star from the yellow sponge paper, then stick this on the red sponge to have a shadow effect on the outer part of the star. Cut this afterward.

Step 13: (xmas tree photo 13) Glue the star on the pointed top of the tree.

Step 14: (xmas tree photo 14) Using long nose pliers, make a loop from the copper wire.

Step 15: (xmas tree photo 15) Secure the loop on the back of the star using concrete glue.

Step 16: (xmas tree photo 16) Cut a reasonable length of crochet thread. This will be used to hang the ornament.

Step 17: (xmas tree photo 17) Tie the thread tightly.

Step 18: (xmas tree photo 18) Loop the thread on the loop wire on top of the mini Christmas tree.

Step 19: (xmas tree photo 19) Done and ready to use.

Step 20: (xmas tree photo 20) You can now hang your ornament on your Christmas tree.

Variations of colors are highly encouraged for this project. Make sure that you tightly roll each layer to make it more durable. You can reuse this mini Christmas tree ornament every year since it is easy to clean and easy to store. Let us make more and have fun!